Adjustable Pediatric Prosthetic Socket
What I Did
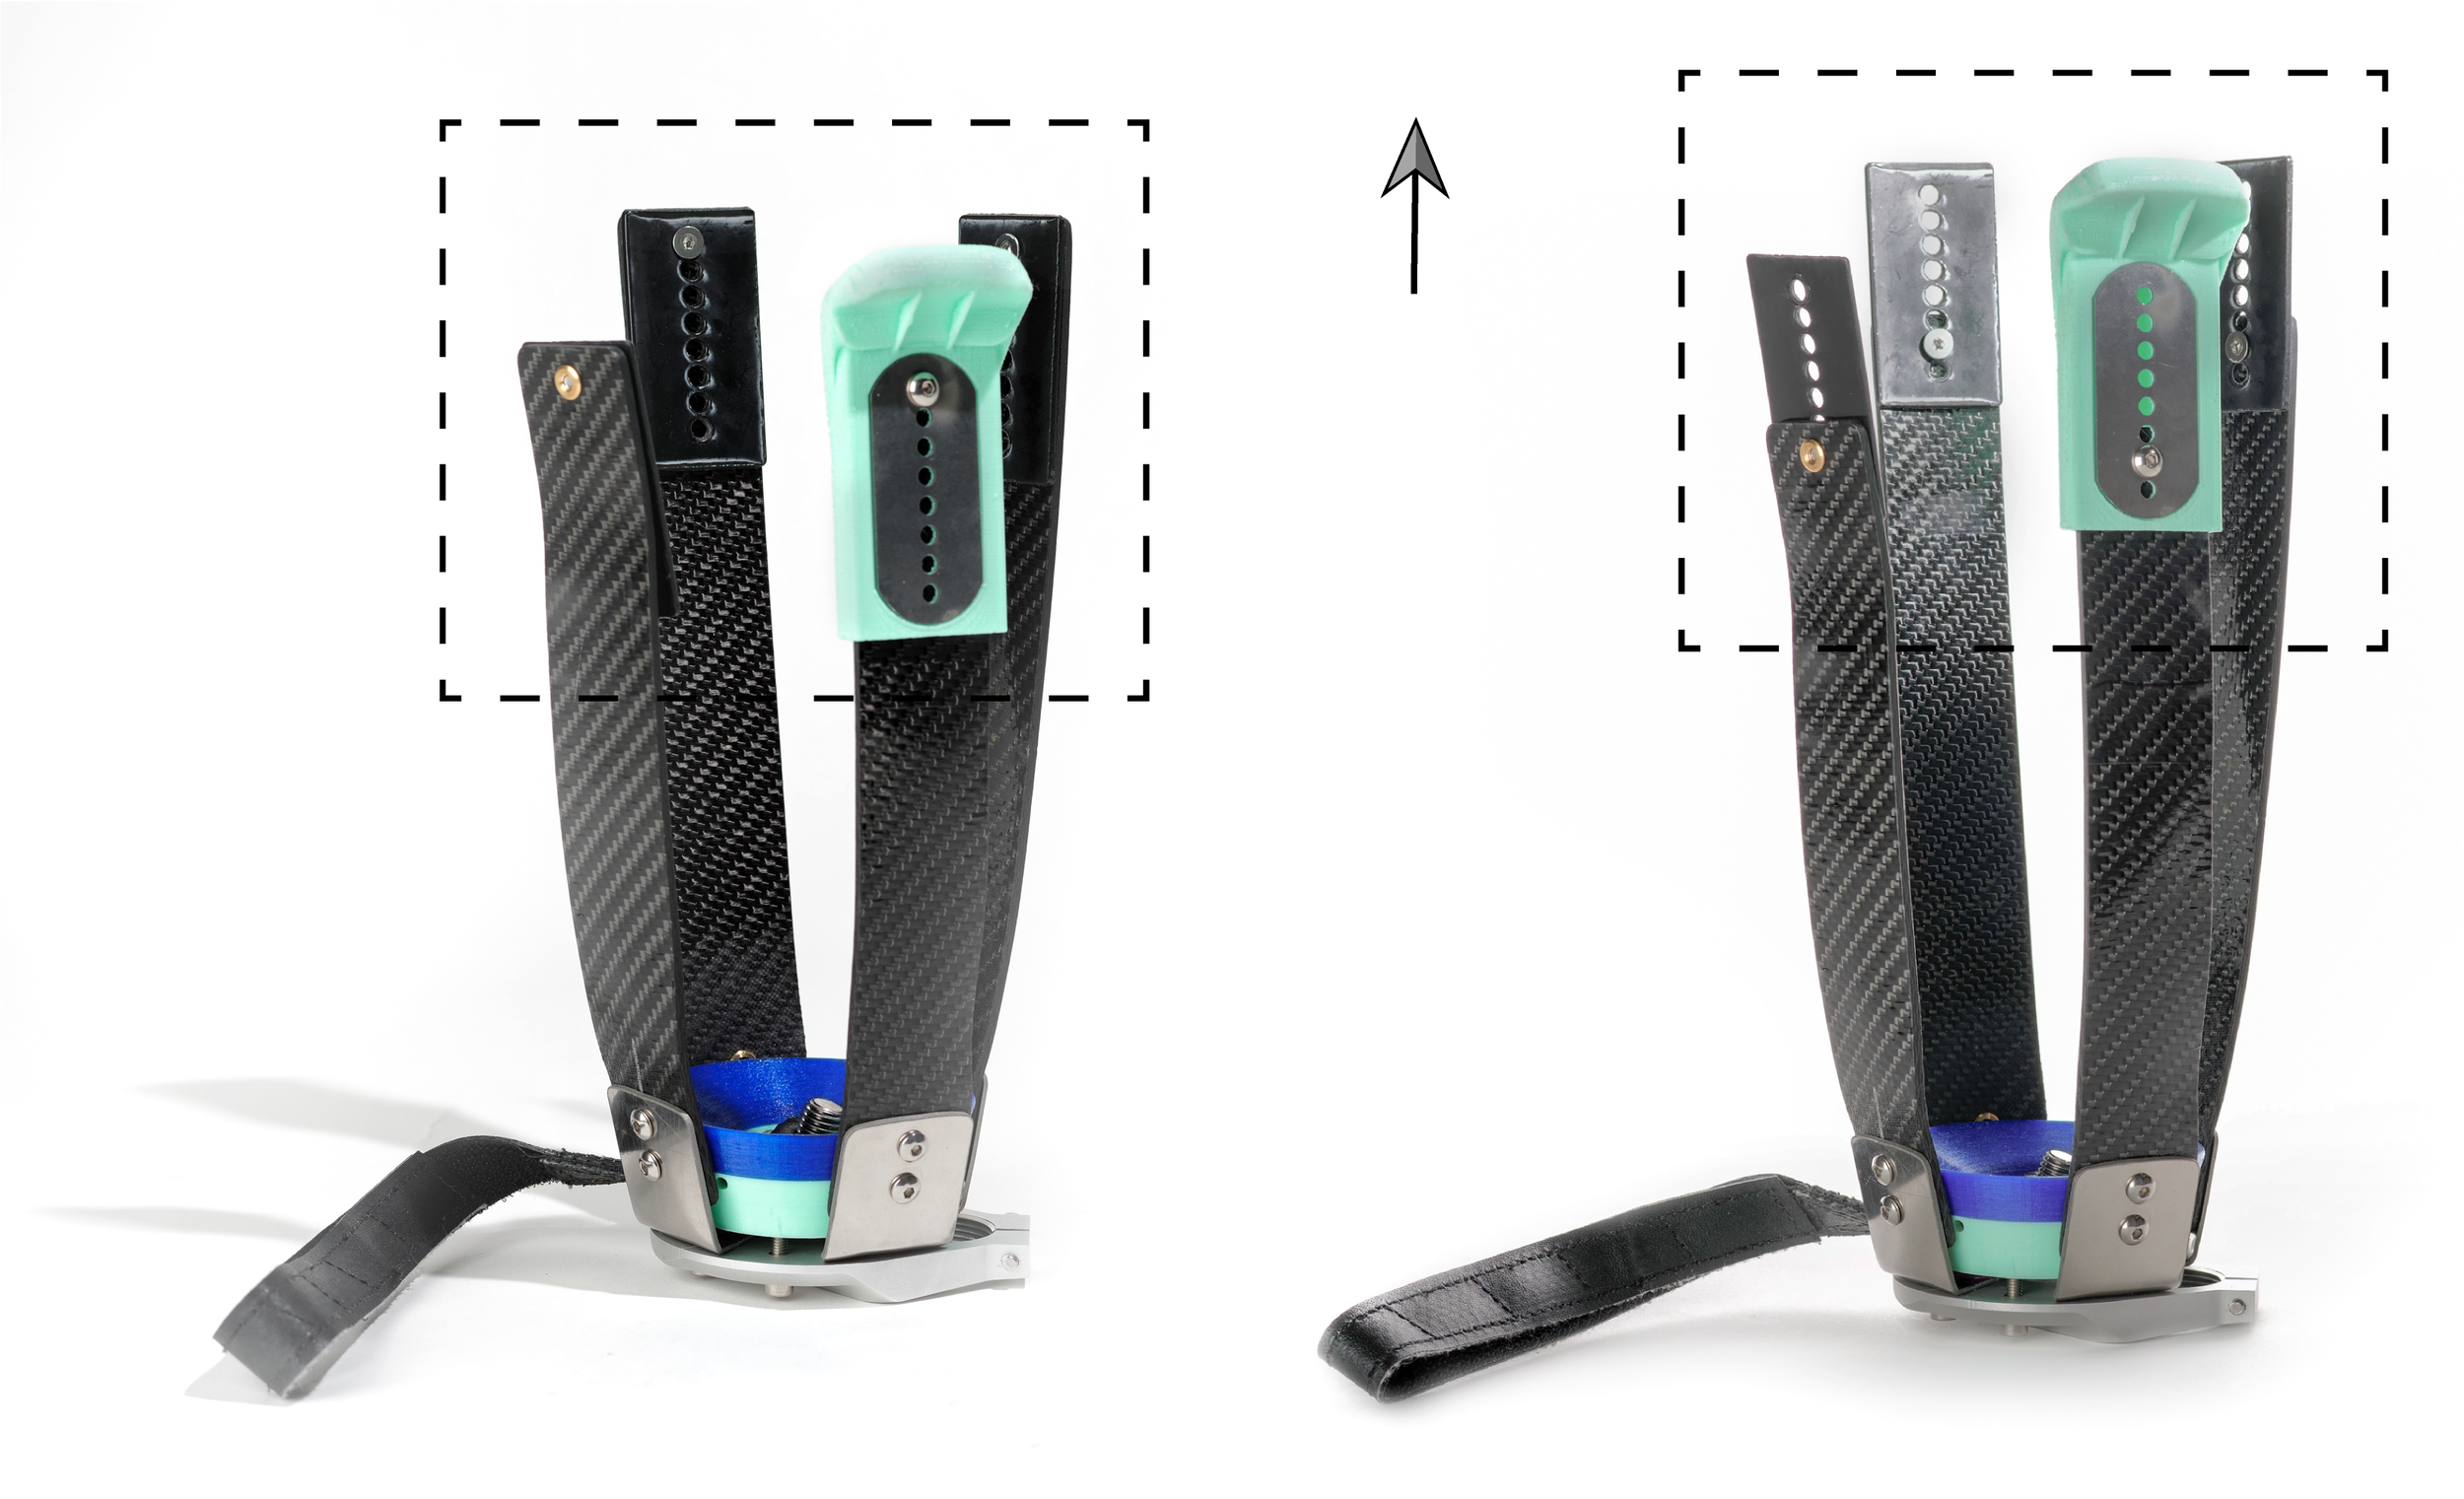
I led the research and development of a user-friendly, adjustable pediatric prosthetic socket for lower-limb amputees to provide more options for prosthesis comfort. I executed my own design plan which included initiating and conducting interviews and clinic visits, outreach for test users, developing concepts and prototypes, and worked with a 10-year old amputee to test and iterate on the designed prototype.
Role: Research + Design Engineer, Project Lead

Teammates
Monica Ha, Soft Goods Designer
Brittany O’Neal, Prosthetist
Samer Moussa, Prosthetist
Jesse Williams, VP of Engineering

Stakeholders

Toolkit
Interviews
Observations
Contextual inquiry
Desk research
Qualitative analysis
Quantitative analysis
Brainstorming
Computer-aided design (CAD)
Sketches
Mock-ups
3D printing
Machining
User testing and validation
The Process

Clarify the Goal
Our goal was to design a pediatric prosthetic socket for lower limb amputees that can adjust with child growth and empower users to adjust their own socket for comfort and daily use.

Understand the Situation
Standard sockets can result in pain and blisters for some users, making the prosthesis unwearable and restricting users to wheelchair or crutch use. We also had a successful adult socket and a previous one-off children’s socket to learn from.

Bridge the Gap
I conducted research (desk research, interviews, and clinic visits) with prosthetists, children’s hospital orthopedic surgeons, parents, and amputees to understand the unique situations of children amputees. Based on that data, I identified a target market and ideated on innovative concepts to develop the socket using existing and new feedback. During the development of prototypes, I conducted outreach and partnered with a child amputee and their caretaker to work with for alpha testing of the final prototype.
How I Did It
Click through the gallery to read more about each step of my process.